CHECKLIST FOR PIPING ISOMETRIC
Piping Isometric drawing is an isometric representation of single line. It is the most important deliverable of piping engineering department.Piping fabrication work is based on isometric drawings. It shows the straight lengths of all the pipe runs on the drawing as clearly as possible. Indicating the line numbers for pipe runs clearly within the drawing. The line number indicates the fluid service, piping class and material, insulation details etc.
Data Required for Checking Piping
Isometric
|
Sr no |
Documents |
Purpose |
|
1 |
P&ID (Piping and Instrumentation Diagram) |
To identify Line Size, Line Number,
instrumentation, valves , insulation and other Special requirements. |
|
2 |
Plot Plan |
To shows the equipment and supporting facilities (pipe racks,
structures, buildings, roads) that are required for the process facility
within a battery limit area. |
|
3 |
Building GA |
To identify Equipment Location &
Orientation. |
|
4 |
Equipment GA |
To check the Nozzle Location &
Orientation , Nozzle size etc |
|
5 |
PMS (Piping Material Specification) |
To check Piping material |
|
6 |
Line List |
To check design Pressure & temperature,
Insulation Requirement, Stress critical Line, hydro test detail,
etc. |
|
7 |
Valve data sheet |
To check valve size , type of actuator, etc. |
P&ID
RELATED
1. Line
number and pipe class.
2.
Flow
direction (including flow direction of check valve)
3.
Min/max
distances, straight lengths, etc. as specified in P&ID.
4.
Removable
spool requirement, if any.
5.
Slope/no
pocket/free draining requirement, if any
6.
Equipment
nozzle/TP numbers and tie-in numbers
7.
Close/open
position for spectacle blind or spacer & blind.
8.
Tag
nos. of equipment, instruments, special items, actuated and manual valves (if
applicable).
LAYOUT RELATED
·
High point vents and low point drains are provided, as per
project requirements, for lines that will be hydro-tested
·
Drains are provided wherever liquid stagnation can occur in the
lines e.g. downstream of a check valve.
·
Adequate pipe spool lengths are provided for wafer type
butterfly and check valves to prevent the interference of the valve disc with
adjacent piping items.
·
The platform/grade/building wall/dyke or bund wall/floor
penetrations and limits of road crossings are properly shown wherever
applicable.
·
The insulation limits are specified appropriately (esp. for
personal protection)
·
Minimum distance between welds is taken as per Project
specifications.
·
Unions are provided in galvanized piping where threaded in-line
items need to be removed for maintenance. Also, unions are provided at regular
intervals in straight pipe runs.
·
Full couplings are provided where applicable for small bore
piping.
·
For piping below 2”, WN flanges are not directly welded to SW
fittings. Also, PE pipes are not directly welded with swaged reducers
(couplings are used in between).
·
Appropriate break-up flanges are provided in piping with
internal lining and hot-dip galvanized piping (based on tub size). Spool
configuration is made with one elbow or one tee only to ensure proper
galvanizing.
·
Lifting lugs are provided for removable spools wherever required
as per project requirements.
·
The piping interfaces with equipment/package nozzles/terminal
points are checked (w.r.t. size, rating, flange face type and nozzle/TP nos.).
·
The electrical tracing requirement and its limits are specified
appropriately.
·
The straight length requirement for suction & discharge
piping for compressors & pumps is as required by Vendor/project specs.
·
The wrapping and coating requirement and its limits are
specified appropriately for u/g lines.
·
Straight lengths and branch configuration of upstream/downstream
lines for anti-surge valves is as per Compressor Vendor’s recommendation.
·
The F/F dimensions of all valves, special items and in-line
instrument items are as per approved vendor drawings.
·
The instrument connections are checked with Piping-Instrument
interface drawings/Instrument hook-up drawings.
·
The straight length requirement (u/s & d/s) has been
provided for flow meters (e.g. flow orifices, flow nozzles, venture meters) and
is as per Project standards/Vendor requirements.
·
Line configuration allows easy removal of spectacle blinds/spacers
& blinds and valves in case of RTJ flange joints.
·
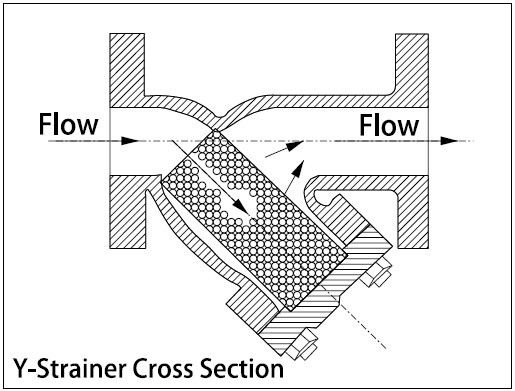
Flanged spools are provided in the case of conical strainers to
enable removal.
·
Orientation of valve handwheel / lever is checked in model for
proper access and commented accordingly
·
Line routing is visually checked in model for general
requirement like access to in line items, supporting, clearances, obstructions,
consistency and aesthetic requirement, etc.
·
Branches like drains, drip legs, etc. are located with
sufficient clearance from the supports, steel or other obstructions so that
they do not clash during expansion/contraction.
· Drip leg size and dimension is checked with Standard drawing for steam line.
CODE AND STANDARD |
Title Block
- Line Number
- Isometric Drawing
Number
- Sheet Number
- P & ID Number
- Piping Layout/GAD Drawing
Number
- Project Name, Project Code and Area
Code
- Insulation and Heat Tracing Type (If the
line is insulated only)
- Line Testing Type.
- Inspection Class
- Hydro-test / Pneumatic test pressure
- Design Pressure and Design Temperature (It’s not mandatory)
Drawing Area
- Iso North
- Equipment name and location
- Co-ordinates for all
equipment
- Nozzle orientation
- Nozzle size and tag
- Angle allocation and direction (clockwise
or anti-clockwise)
- Nozzle centreline elevation
- Line elevations (it can be center line or BOP (Bottom
of Pipe) elevation)
- Line offset angle and
direction
- Slope (if it’s required as per project)
- Line number with complete spec detail
- Spec break (If
required)
- Dimensions of all components and spools
- Fluid flow
direction
- Support locations
- Continuation isometric drawing number (if
the complete line do not fit in the single sheet)
- Instrument location and tagging.
- Valve
orientation
- Control Valve location and
arrangement.
- Orifice Meter straight run
requirement
- Field weld and Workshop weld Identification
BOM [Bill of Materials]
- Component Description
- Component
Quantity
- Commodity
Code
- Valve type and quantity
- Piping component size and rating
- Codes and Standards (Pipe Schedule
Number)
- Non-piping component BOM should not
include on isometric drawing
- Do not include the “on hold”
materials
- Special items, instruments, and pressure
assembly should be tagged
- Spool length and size


1 Comments: